There was a thread going on earlier this week about how to change a value for an OMS property setting. This is typically done when working with support to adjust a timing or enable debug or tracing.
The most common way is using emctl set property at command level.
$ emctl set property -name oracle.sysman.eml.maxInactiveTime -value 60
To get the current setting there’s a emctl get property command:
$ emctl get property -name oracle.sysman.eml.maxInactiveTime
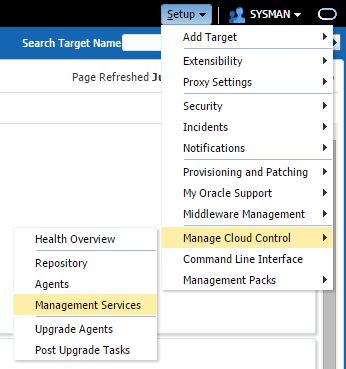
That usually works great if support has just given you the exact command to run, or you’re using a MOS note to reference the exact syntax. However, if you’re getting older like me, and syntax is just one of those things that you tend to put in the way back corners of your brain… you tend to forget was it oracle.sysman.eml.maxInactiveTime or was it oracle.em.sysman.maxTimeout or… There’s just too many to remember. Lucky for us, there is now a place to view and set these properties in the EM console. You can find it under Setup / Manage Cloud Control / Management Services.
Then under the Management Servers menu select Configuration properties.
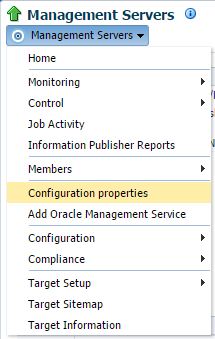
From here you’ll get a window that lists the non-default properties. Understand, that some properties will not show up, that doesn’t mean they are not set, but that they just have the system default value.

By switching the Show view to All, you’ll see a larger list of properties. Not all of them are modifiable, as indicated by the lock icon. If you want to view more information about a property, or modify it, click on the Name. This will bring up a new window, with the ability to modify the value and save. This view will also tell you whether the property is Dynamic (can be changed without OMS restart). If you expand the Change History, you can also view the previous changes for this parameter.

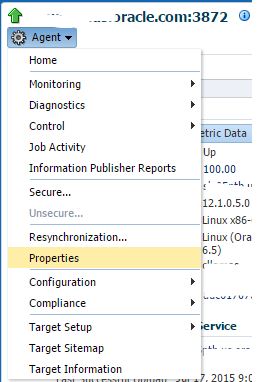
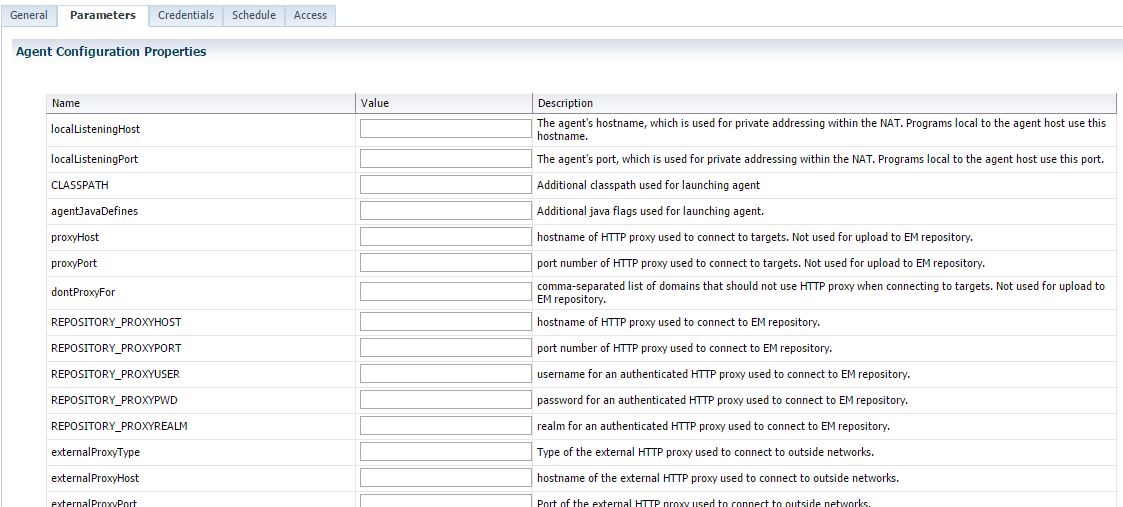
Of course, not all properties are OMS based, so there’s an equivalent option on the Agent side. From the Agent home page, click on Agent menu then select Properties.
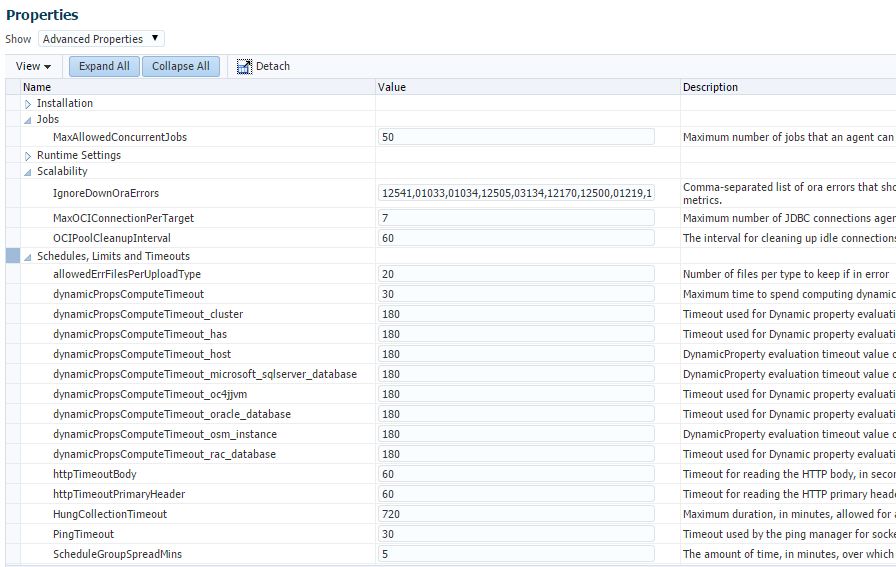
You will get a list of properties, some which you can edit, some you can’t. By default the basic properties are shown.
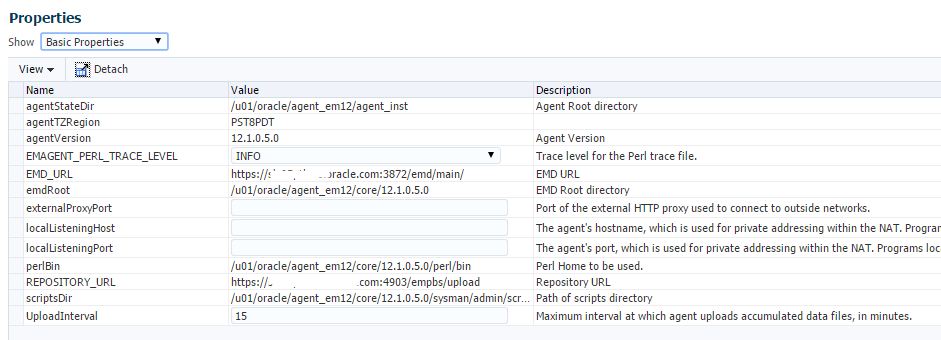
Select Advanced Properties to see additional agent properties such as dynamicPropsComputeTimeout which is often adjusted on very large servers.
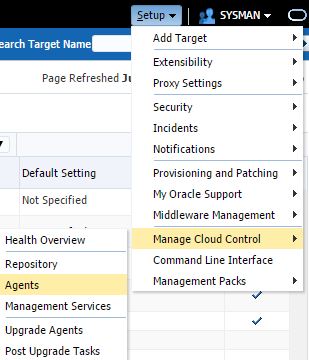
This is great right? But what if you want to change the same property on 1000 agents? Well, that’s in here too! Click on Setup / Manage Cloud Control / Agents.
From there, click on the agents (or just one for now) and click Properties.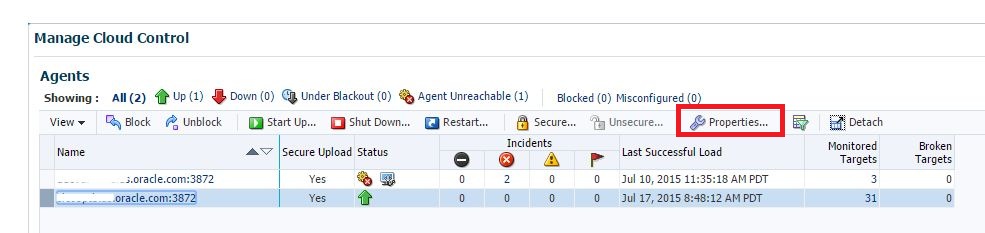
This will start a job wizard in which you can add additional agents by clicking Add in the Targets section. Then click on the Parameters tab.
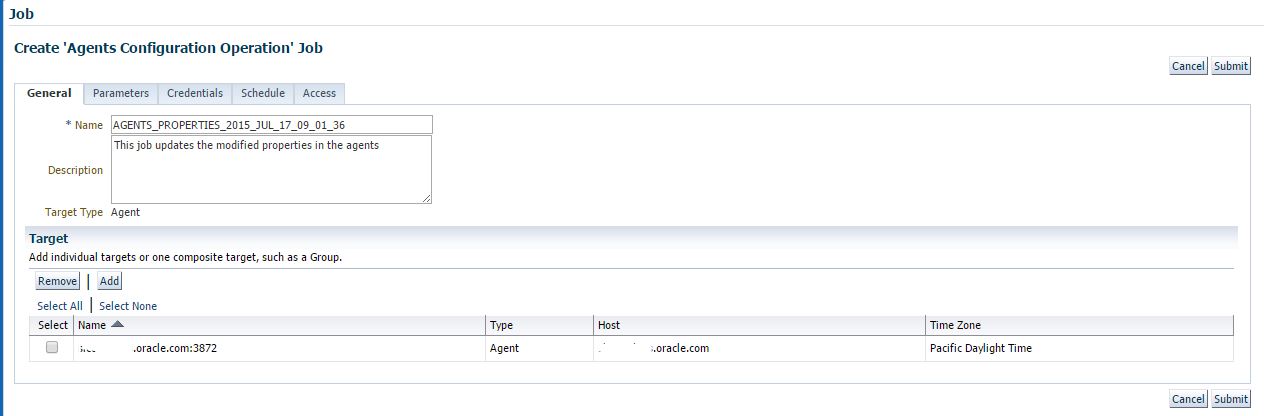
Now you can set the parameter value that you wish to push out to all selected agents.
The caveat — use with caution and common sense. There’s a lot of parameters in here, and very little are documented, some should not be changed unless directed by Oracle Support. So don’t go cowboy on us and start tweaking them all just to see what they do!